How to build animations with ebiten using the ECS pattern
Having played computer games more or less all my life with varying intensity it always has been a dream of mine to build a game by myself. The list of abandoned github repositories is a testament of that dream (1, 2 and the latest candidate being 3 UPDATE: you can play my first game!!! here: https://co0p.github.io/foodzy/).
In college, I was taught Java naturally I started to hunt for books such as “Developing Games in Java” by D. Brackeen from 2003 or “Killer Game Programming in Java” by A. Davison from 2005. Then I got into JavaScript, and guess what: they have gaming books as well, like “Pro HTML5 games” written by the creator of Command & Conquer in HTML5 A. R. Shankar.
Long story short, I got no game developed :-( - but at least a job in the software engineering industry, and I read a few books. Then I got into the programming with Go and found this amazing library https://ebiten.org which is truly a “dead simple 2D game library for Go”. Thoughts about game development started to surface again. Research on how to get actual pixels on the screen and how big game engines such as unity today structure a computer game followed.
In this blogpost I will take you through the steps of rendering an image, using a pseudo Entity Component System Architecture (short ECS) for structuring things and closing with a working animation. The ebiten library will take care of the rendering. Most code examples in this blog post show only the method signatures. The whole code can be found at github.com/co0p/ebiten-ecs-animation. As you might have guessed, I am not a professional game developer and have no prior experience with the ECS pattern or the ebiten library. So take everything with a grain of salt - this is me experimenting in public. So without further ado, let’s get started!
What I am trying to do is really simple. It shouldn’t be hard …

The empty screen
A computer game is basically a simulation, and the game loop is responsible for running it. To read more about the game loop and different variations see the excellent gameprogrammingpatterns.org website.
Basically the game loop continuously executes the following three actions until the user exists the program:
- process user input
- update the simulation state
- render the state
In order to run your game with ebiten you call the ebiten.RunGame(game Game) method, with game satisfying the
Game interface. In the following example, the struct
EmptyScreenExample implements the interface, from which two methods should remind you of mentioned game-loop steps above.
package main

import  "github.com/hajimehoshi/ebiten/v2"

const screenWidth = 500
const screenHeight = 500

type EmptyScreenExample struct { }
func (a *EmptyScreenExample) Update() error { return nil }
func (a *EmptyScreenExample) Draw(screen *ebiten.Image) { }
func (a *EmptyScreenExample) Layout(ow, oh int) (int, int) { return ow, oh }

func main() {
	example := EmptyScreenExample{ }

	ebiten.SetWindowSize(screenWidth, screenHeight)
	ebiten.SetWindowTitle("empty screen example")
	ebiten.RunGame(&example) // omitted error handling
}
The ebiten library takes care of creating the window for us, setting the size as well as adding a title to the window. Voilà, we have an empty window!
working code at: empty window example
Not bad for a start. In order to have an actual animation drawn on the screen, we have to
- load some images into memory which resemble the individual animation steps
- put one of those images at a position on the screen and render it
- update the rendered image aka animate it
To get this setup going, my object-oriented brain wants to put the data, the animation logic and rendering into one animation class. Already thinking ahead, I could even have a base class and create many game objects inheriting from the base animation class. But we are not going to do that: Instead we will be using the ECS pattern to organize our code and game object management.
ECS way to do things
In an ECS (short for Entity Component System), the traditional game object is replaced with an entity which has many components associated. The entity is just a means to group the components together. And those components carry only data. Responsible for acting upon and manipulating the data are the systems. Yes, the data and the manipulation are seperated and are not to be found in one place! Basically, the whole game logic has been moved into the systems which read and manipulate the data stored in the components.
In the following example there are 2 entities. They both have a sprite and transform component. The first entity also has an animation component associated. When the game runs, the two systems continuously query for entities that have the necessary components attached and then read the data stored in components and apply the game logic. The animation system for example is only interested in entities that have an animation component and knows nothing about rendering a sprite. It’s sole purpose is to run the animations.
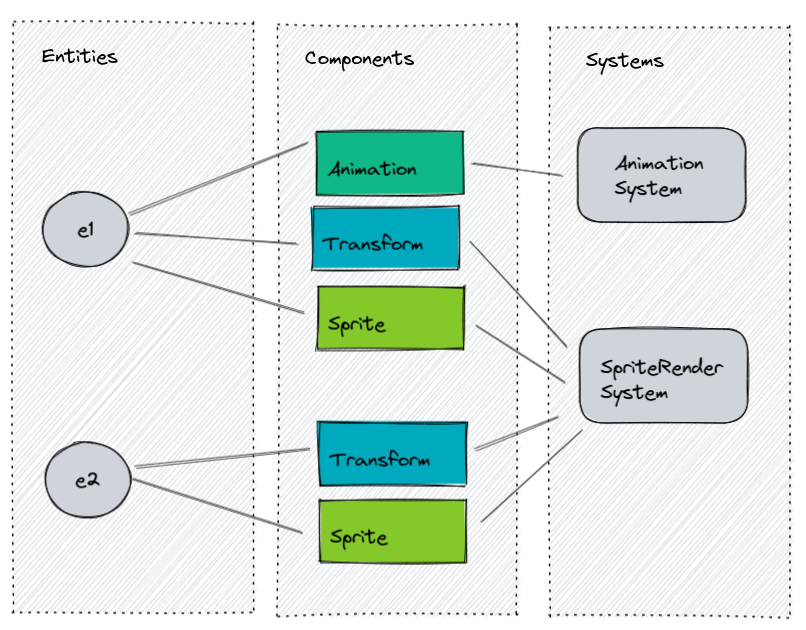
This data-oriented way supports “performance by default” according to the unity team, because it allows for cache-friendly memory layout. The ECS way also enables the game designer to mix behavior of individual entities. The Cherno has a great video showing the benefits of ECS and explains why my initial object-oriented way of thinking might not be a good solution.
Moving all game logic into the systems feels very strange to me. We can no longer look at the player-game-object and reason about the states the player can be in. This being an experiment, I will go with it and see where this will take me.
The entity
The following example does not adhere to the original definition of an ECS where the entity is a dumb identifier
that logically groups components together. Instead, my Entity has a map of attached components based on
the component type ComponentType. This is counter-productive to the aforementioned cache-friendly memory optimizations
but makes the code a little easier to grok. In a later phase, one could optimize the storage of the entity, and it’s components
as an archetype fashion to circumvent the performance hit.
The Entity type has a few utility methods attached that make the management of the entity’s components easier.
// ComponentType defines the supported component types in a user readable format
type ComponentType string

// ComponentTyper returns the type of a component
type ComponentTyper interface { Type() ComponentType }

type Entity struct {
    components map[ComponentType]ComponentTyper
}

// HasComponent returns true if the entity has the component of type cType associated
func (e *Entity) HasComponent(cType ComponentType) bool { /* ... */ }

// GetComponent returns the component from the entity, panics if not found
func (e *Entity) GetComponent(cType ComponentType) ComponentTyper { /* ... */ }

// AddComponent adds a component to the entity, panics if a component of the same type already exists
func (e *Entity) AddComponent(c ComponentTyper) { /* ... */ }
Now this is where the data-oriented way of structuring a game in Go becomes tricky.
Go has the concept of an interface that describe behaviour.
But we want to store different types of data (aka components) in a collection belonging to an entity.
So I opted for a ComponentType to carry the type and a ComponentTyper interface to be implemented by each
component. This allows the entity to store all components in one map. Conveniently, this also implements the
common constraint in an ECS that one entity can only have one component of the same type associated.
Storing the entities
I previously mentioned, that the systems of an ECS are responsible for reading, manipulating and acting upon the data stored
in the components. In order to do that, the systems need a common way to access the actual entities. Enter the mighty registry,
the one place that rules all entities. Each system will hold a reference to this Registry, which is responsible
for creating entities and provides the systems with a way to Query() for entities that meet certain criteria.
The only supported criteria currently is the list of ComponentTypes that must be present on the entity.
One could extend this concept with an actual CriteriaType adding negation into the mix etc.
But a list of “must-be-present” ComponentTypes will suffice.
type Registry struct {
	entities []*Entity
}

// NewEntity creates a new entity, adds it to the internal list of entities and returns it
func (r *Registry) NewEntity() *Entity { /* ... */ }

// Query returns all entities that have all types of components associated
func (r *Registry) Query(types ...ComponentType) []*Entity { /* ... */ }
The first two components
Before we get into the animation of a sprite, let’s introduce the basic components and system to render a single image. Once we are able to render a single image, implementing an animation comprised of multiple images should not be that hard.
In order to render an image we need the actual bytes of the image and the x,y position of where to put the image on the screen.
Both is data - therefore we should put this into the respective components: SpriteComponent for holding the bytes of
the image and a TransformComponent for the position. Both components implement the ComponentTyper interface,
enabling us to add those components to an entity and allowing the Registryto execute queries on those entities
and have the systems ultimately access the data.
As mentioned the SpriteComponent is just a container holding a reference to an ebiten.Image .
const SpriteType ComponentType = "SPRITE"

// SpriteComponent holds a reference to an image to be drawn
type SpriteComponent struct {
	image *ebiten.Image
}
func (t *SpriteComponent) Type() ComponentType { return SpriteType }
A TransformComponent could potentially carry more data, such as a scaling factor, the rotation etc. For our
demonstration, the X and Y position suffice.
const TransformType ComponentType = "TRANSFORM"

// TransformComponent describes the current position of an entity
type TransformComponent struct {
	posX, posY int
}
func (t *TransformComponent) Type() ComponentType { return TransformType }
To create an entity with those two components one would ask the registry for a new entity, create and assign the components. Later each system can then query for them:
registry := Registry{}

entity := registry.NewEntity()
entity.AddComponent(&TransformComponent{posx:1, posY:200})
entity.AddComponent(&SpriteComponent{image: &someImage})

// ...

entities := registry.Query(TransformType, SpriteType)
// entities[0] == entity
The sprite render system
Writing the SpriteRenderSystem is straight forward. Query for entities that have a TransformComponent and
a SpriteComponentassociated, loop through them and ask ebiten to render the image at the specified
position on the screen. Because components are just data containers without behaviour, we have to cast the
components to their appropriate type based on the ComponentType.
By ensuring that an entity can only have one component of the same type, and having the entity HasComponent() method panic
if the component is not present when asking for it, the cast is safe enough. Asking an entity for a component that is not
present is in my opinion an error by the programmer which should not be handled or mitigated by propagating an error.
type SpriteRenderSystem struct {
	registry *Registry
}

func (s *SpriteRenderSystem) Draw(screen *ebiten.Image) {

	for _, e := range s.registry.Query(TransformType, SpriteType) {

		position := e.GetComponent(TransformType).(*TransformComponent)
        sprite := e.GetComponent(SpriteType).(*SpriteComponent)

        op := &ebiten.DrawImageOptions{}
		op.GeoM.Translate(position.posX, position.posY)
		screen.DrawImage(sprite.image, op)
	}
}
Finally, rendering an image
Now that we have all the ECS parts in place, it is time to load an image, create an entity, add components and ask the system to render it. For demonstration purposes I am using a gopher which comes with the ebiten library as a resource for the flappy gopher example.
func main() {
// loading assets
img, _ := LoadImage(flappy.Gopher_png)
sprite := ebiten.NewImageFromImage(img)
// entities
registry := Registry{}
gopher := registry.NewEntity()
// components
gopher.AddComponent(&TransformComponent{posY: 200, posX: 200})
gopher.AddComponent(&SpriteComponent{image: sprite})
// systems
spriteRenderSystem := SpriteRenderSystem{ registry: ®istry }
// the game implementing the ebiten.Game interface
example := SimpleImageExample { spriteRenderSystem: &spriteRenderSystem }
ebiten.SetWindowSize(screenWidth, screenHeight)
ebiten.SetWindowTitle("render single image")
ebiten.RunGame(&example) // omitted error handling
}
First we convert the bytes into a image.Image using our own utility function LoadImage(). The image is then
converted into a ebiten.Image by a utility function provided by ebiten. After loading the asset, we ask the registry
to create a new entity and attach the necessary components to it. Finally, we create the sprite render system, put
everything into our example game struct and hand it over to ebiten - which renders a nice gopher!
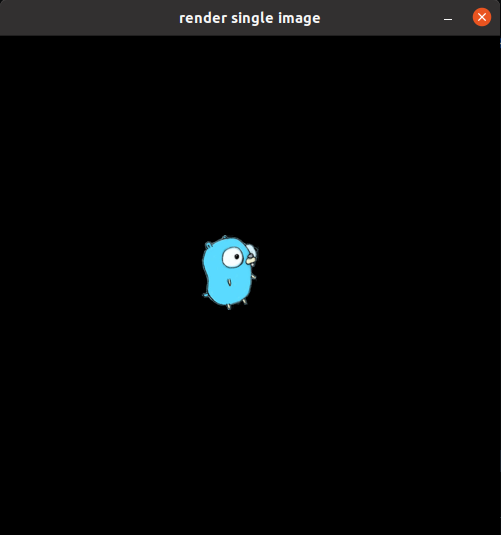
working code: single image example
I have to admit, this is a lot of code just to render an image. Compare this with the ebiten example which has the same result, you wonder if this ECS way is a good idea. At least we have some structure :-) and a generic way of positioning and rendering images. Now it is really easy to render multiple gophers…
for i := 0; i < 1000; i++ {
		x := rand.Intn(screenWidth)
		y := rand.Intn(screenHeight)
		randomGopher := registry.NewEntity()
		randomGopher.AddComponent(&TransformComponent{PosX: float64(x), PosY: float64(y)})
		randomGopher.AddComponent(&SpriteComponent{Image: sprite})
	}
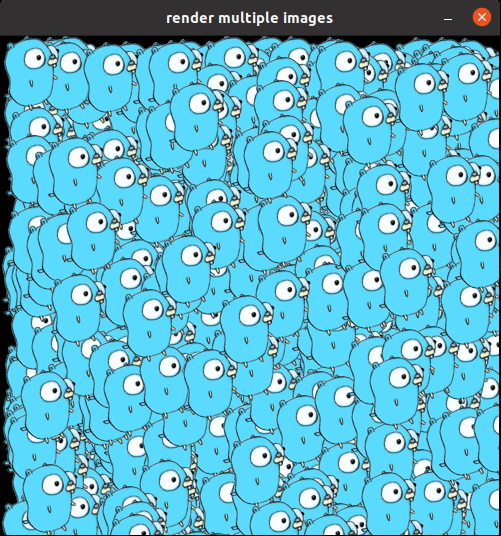
working code: multiple images example
Big finale - animations!
Now to the big finale: Getting some animations going! From the previous section we already know how to render an image. What we are missing are multiple images that comprise the individual frames of the animation. We are missing the logic to update the currently active frame to be drawn on the screen as well.
For the animation I will be using a gopher jumping a rope provided by Jon Calhun from gophercises.com. I moved the individual images of the gif into one single spritesheet.
![]()
A spritesheet is an image containing all frames necessary to draw the animation. For performance reasons in game development it is common to put all assets in one big spritesheet, the name texture atlas is also common.
In order to make our lives easier, we will load the spritesheet once, extract each subimage and save each frame as an individual ebiten.Image.
The following utility function LoadSpritesheet() returns all frames as long as they have the same dimensions. In our case we
know that we have 4 gophers, each gopher is 250 pixels wide and 260 pixels of height.
// LoadSpritesheet returns n sub images from the given input image
func LoadSpritesheet(input []byte, n int, width int, height int) []*ebiten.Image {
	sprites := []*ebiten.Image{}

	spritesheet, _, _ := image.Decode(bytes.NewReader(input))
	ebitenImage := ebiten.NewImageFromImage(spritesheet)

	for i := 0; i < n; i++ {
		dimensions := image.Rect(i*width, 0, (i+1)*width, height)
		sprite := ebitenImage.SubImage(dimensions).(*ebiten.Image)
		sprites = append(sprites, sprite)
	}

	return sprites
}
Now that we can load the assets we have to store them somewhere. Storing sounds like data - and data belongs into a component!
Let me introduce you to the AnimationComponent:
const AnimationType ComponentType = "ANIMATION"

// AnimationComponent holds the data necessary for the animation of frames based on the animation speed
type AnimationComponent struct {
	Frames            []*ebiten.Image
	CurrentFrameIndex int
	Count             float64
	AnimationSpeed    float64
}

func (a AnimationComponent) Type() ComponentType { return AnimationType }
We now have an animation component which holds all the information needed to run an animation:
Framesis a slice of references toebiten.Imagewhich are the individual images of the animationCurrentFrameIndexpoints to the current active frame to render. This will be used by the animation system to update the sprite componentCountholds the current advance of the animation. This will be increased each Tick by the amount ofAnimationSpeedAnimationSpeeddefines how fast the system cycles through the animation
The logic part of an animation has to live somewhere as well. You probably guessed it already. Let me introduce you to
the AnimationSystem! Similar to the SpriteRenderSystem the system needs the entities
(to be more precise, the entity’s components) to operate on. The basic idea is the following:
- fetch all entities that have an
AnimationComponentandSpriteComponentadded - advance and update the animation data of the
AnimationComponent - update the sprite reference in the
SpriteComponent
type AnimationSystem struct {
	Registry *Registry
}

func (s *AnimationSystem) Update() error {
	entities := s.Registry.Query(AnimationType, SpriteType)

	for _, e := range entities {
		a := e.GetComponent(AnimationType).(*AnimationComponent)
		s := e.GetComponent(SpriteType).(*SpriteComponent)

		// advance animation
		a.Count += a.AnimationSpeed
		a.CurrentFrameIndex = int(math.Floor(a.Count))

		if a.CurrentFrameIndex >= len(a.Frames) { // restart animation
			a.Count = 0
			a.CurrentFrameIndex = 0
		}

		// update image reference
		s.Image = a.Frames[a.CurrentFrameIndex]
	}
	return nil
}
I could have added a Draw() method to the AnimationSystem. But this would duplicate the rendering of an image. So
we are reusing the fact, that we already have a SpriteRenderSystem in place. This is also a good showcase of
separating the actual concerns of the game loop (rendering and updating the state that is). This is also a showcase
of how systems can influence each other through setting data on “shared” components. In this case the animation system
is updating data in the sprite component.
Back to rendering an animation, because now we have everything in place to draw an actual animation using the ebiten library in an ECS fashion!
// loading assets
frames := LoadSpritesheet(Spritesheet, 4, 250, 260)
// entities
registry := Registry{}
e := registry.NewEntity()
e.AddComponent(&AnimationComponent{
Frames: frames,
CurrentFrameIndex: 0,
Count: 0,
AnimationSpeed: 0.125,
})
e.AddComponent(&SpriteComponent{Image: frames[0]})
e.AddComponent(&TransformComponent{PosX: 100, PosY: 100})
// systems
animationSystem := AnimationSystem{Registry: ®istry}
spriteRenderSystem := SpriteRenderSystem{Registry: ®istry}
// the game
example := AnimationExample{
spriteRenderSystem: &spriteRenderSystem,
animationSystem: &animationSystem,
}
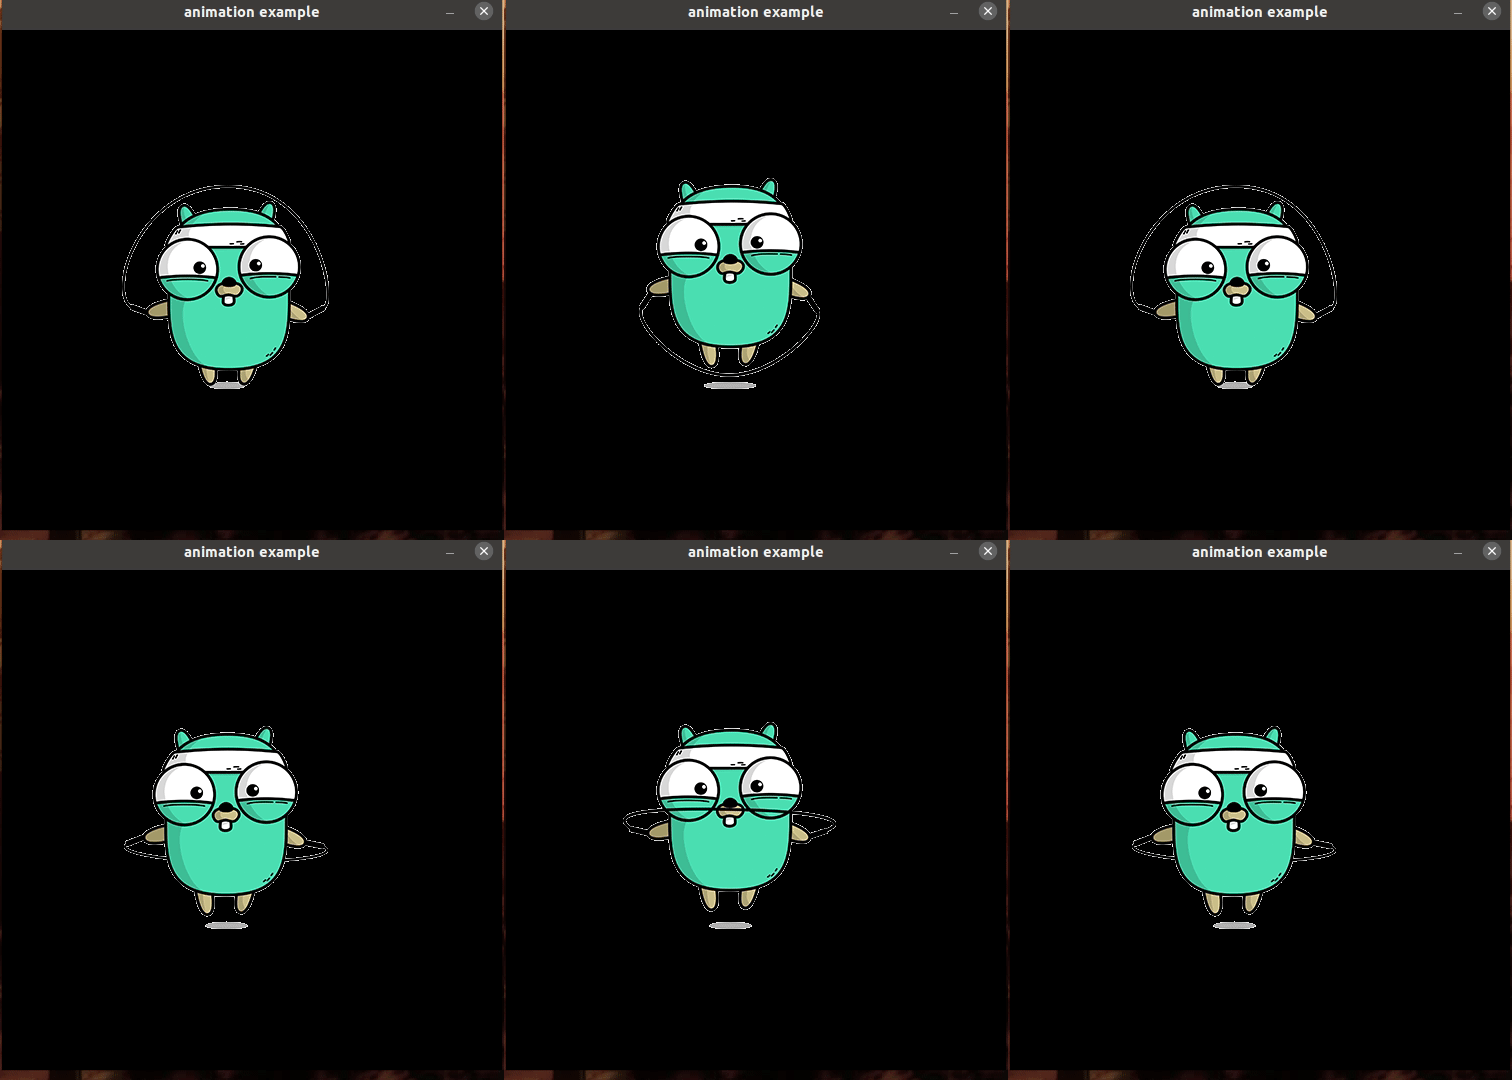
working code: animation example
Closing notes
The ebiten library was really easy to use, the documentation is great and to have running examples on the website gives
you a good starting point.
Implementing the ECS part in Go felt a bit counterintuitive due to the fact, that Go’s abstraction is based
on behaviour and not on data. This forced me to do a few type casts. I ended up writing a lot of code to get an animation
going. To understand how the animation is implemented a fellow programmer has to understand each system and how they interact.
Having the data manipulation open for all systems does not feel “well-engineered” and hinders the reasoning on edge cases, etc.
Maybe it would be better attach public manipulation methods on the Components, such as a AdvanceAnimation() method or
ChangeAnimationSpeed() and have the systems call those methods on the components - tying the mutation logic to the component.
In summary, I am more than happy with the experiment. I learned to use the ebiten library, got some structure using the ECS pattern and have a jumping gopher on the screen! Maybe I end up writing a game after all…
Here is a list of a few resources on ECS:
- the accompanying repo to this blog post github.com/co0p/ebiten-ecs-animation with running examples (see the
/cmd/folder). - A list of Frequently Asked Questions on ECS and answers by the creator Flecs
- The most prominent Entity Component System in game dev universe: ENTT
- The EngoEngine written in Go also has an ECS implementation
- Real world application of the ECS and in depth explanation of the Overwatch Gameplay Architecture
Thanks to Hajime Hoshi for the amazing ebiten library, Jon Calhun for allowing me to use the gopher animation, and Evgenij for proofreading.